
index.md 22KB
title: Introduction to Service Worker
url: http://www.html5rocks.com/en/tutorials/service-worker/introduction/
hash_url: 64fd519153
Rich offline experiences, periodic background syncs, push notifications— functionality that would normally require a native application—are coming to the web. Service workers provide the technical foundation that all these features will rely on.
What is a Service Worker?
A service worker is a script that is run by your browser in the background, separate from a web page, opening the door to features which don't need a web page or user interaction. Today, they already include features like push notifications and in the future it will include other things like, background sync, or geofencing. The core feature discussed in this tutorial is the ability to intercept and handle network requests, including programmatically managing a cache of responses.
The reason this is such an exciting API is that it allows you to support offline experiences, giving developers complete control over what exactly that experience is.
Before service worker there was one other API that would give users an offline experience on the web called App Cache. The major issue with App Cache is the number of gotcha's that exist as well as the design working particularly well for single page web apps, but not for multi-page sites. Service workers have been designed to avoid these common pain points.
Things to note about a service worker:
- It's a JavaScript
Worker, so it can't
access the DOM directly. Instead, a service worker can communicate with the
pages it controls by responding to messages sent via the
postMessageinterface, and those pages can manipulate the DOM if needed. - Service worker is a programmable network proxy, allowing you to control how network requests from your page are handled.
- It will be terminated when not in use, and restarted when it's next needed, so
you cannot rely on global state within a service worker's
onfetchandonmessagehandlers. If there is information that you need to persist and reuse across restarts, service workers do have access to the IndexedDB API. - Service workers make extensive use of promises, so if you're new to promises, then you should stop reading this and check out Jake Archibald's article.
Service Worker Lifecycle
A service worker has a lifecycle which is completely separate from your web page.
To install a service worker for your site, you need to register it, which you do in your page's JavaScript. Registering a service worker will cause the browser to start the service worker install step in the background.
Typically during the install step, you'll want to cache some static assets. If all the files are cached successfully, then the service worker becomes installed. If any of the files fail to download and cache, then the install step will fail and the service worker won't activate (i.e. won't be installed). If that happens, don't worry, it'll try again next time. But that means if it does install, you know you've got those static assets in the cache.
When we're installed, the activation step will follow and this is a great opportunity for handling any management of old caches, which we'll cover during the service worker update section.
After the activation step, the service worker will control all pages that fall
under its scope, though the page that registered the service worker for the
first time won't be controlled until it's loaded again. Once a service worker is
in control, it will be in one of two states: either the service worker will be
terminated to save memory, or it will handle fetch and message events which
occur when a network request or message is made from your page.
Below is an overly simplified version of the service worker lifecycle on it's first installation.

Before We Start
Grab the caches polyfill from this repository https://github.com/coonsta/cache-polyfill.
This polyfill will add support for Cache.addAll which Chrome M43's implementation of
the Cache
API doesn't currently support.
Grab dist/serviceworker-cache-polyfill.js to put somewhere in your site
and use it in a service worker with the importScripts method. Any script
which is imported will automatically be cached by the service worker.
importScripts('serviceworker-cache-polyfill.js');HTTPS is Needed
During development you'll be able to use service worker through localhost, but
to deploy it on a site you'll need to have HTTPS setup on your server.
Using service worker you can hijack connections, fabricate, and filter responses. Powerful stuff. While you would use these powers for good, a man-in-the-middle might not. To avoid this, you can only register for service workers on pages served over HTTPS, so we know the service worker the browser receives hasn't been tampered with during its journey through the network.
Github Pages are served over HTTPS, so they're a great place to host demos.
If you want to add HTTPS to your server then you'll need to get a TLS certificate and set it up for your server. This varies depending on your setup, so check your server's documentation and be sure to check out Mozilla's SSL config generator for best practices.
Using Service Worker
Now that we've got the Polyfill and covered HTTPS, let's look at what we do in each step.
How to Register and Install a Service Worker
To install a service worker you need to kick start the process by registering a service worker in your page. This tells the browser where your service worker JavaScript file lives.
if ('serviceWorker' in navigator) {
  navigator.serviceWorker.register('/sw.js').then(function(registration) {
    // Registration was successful
    console.log('ServiceWorker registration successful with scope: ',    registration.scope);
  }).catch(function(err) {
    // registration failed :(
    console.log('ServiceWorker registration failed: ', err);
  });
}
This code checks to see if the service worker API is available, and if it is,
the service worker at /sw.js is registered.
You can call register every time a page loads without concern; the browser will figure out if the service worker is already registered or not and handle it accordingly.
One subtlety with the register method is the location of the service worker
file. You'll notice in this case that the service worker file is at the root of
the domain. This means that the service worker's scope will be the entire
origin. In other words, this service worker will receive fetch events for
everything on this domain. If we register the service worker file at
/example/sw.js, then the service worker would only see fetch events for
pages whose URL starts with /example/ (i.e. /example/page1/,
/example/page2/).
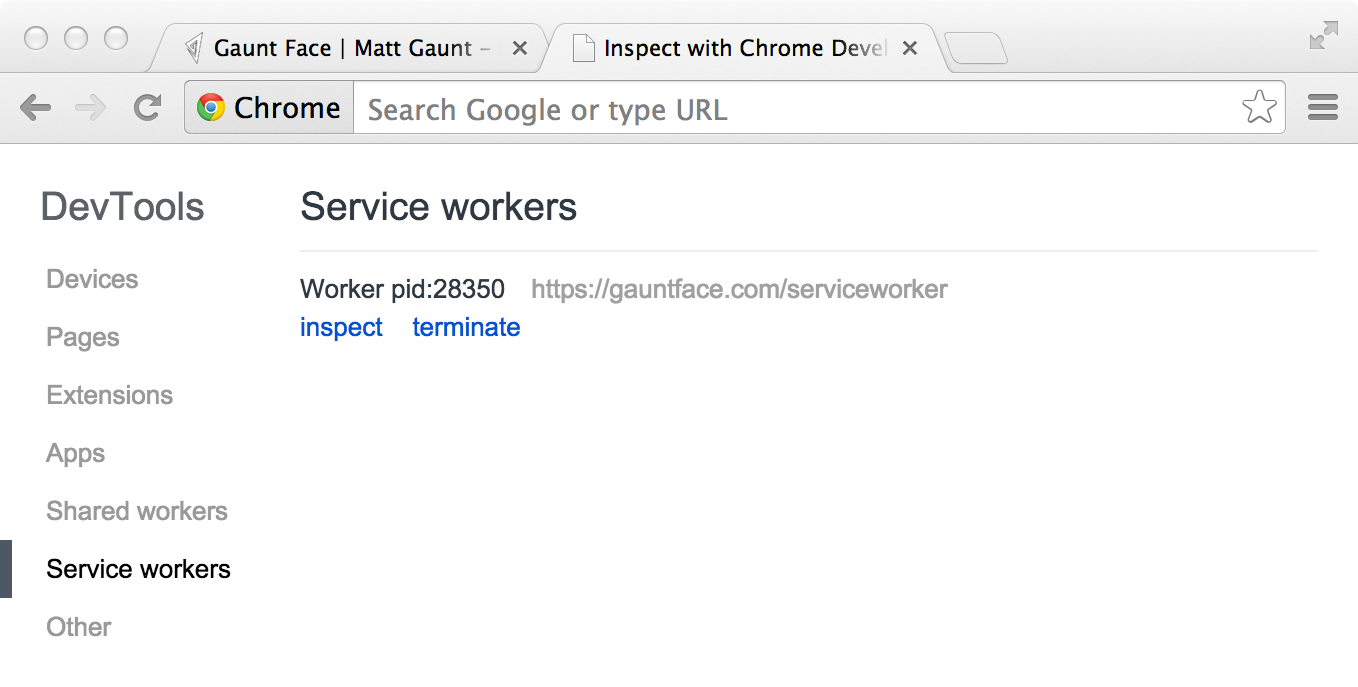
Now you can check that a service worker is enabled by going to
chrome://inspect/#service-workers and looking for your site.
When service worker was first being implemented you could also view your service
worker details through chrome://serviceworker-internals. This may still be
useful, if for nothing more than learning about the life cycle of service
workers, but don't be surprised if it gets replaced by
chrome://inspect/#service-workers at a later date.
You may find it useful to test your service worker in an Incognito window so that you can close and reopen knowing that the previous service worker won't affect the new window. Any registrations and caches created from within an Incognito window will be cleared out once that window is closed.
Service Worker Install Step
After a controlled page kicks off the registration process, let's shift to the
point of view of the service worker script, which is given the opportunity to
handle the install event.
For the most basic example, you need to define a callback for the install event
and decide which files you want to cache.
// The files we want to cache
var urlsToCache = [
  '/',
  '/styles/main.css',
  '/script/main.js'
];

// Set the callback for the install step
self.addEventListener('install', function(event) {
    // Perform install steps
});
Inside of our install callback, we need to take the following steps:
- Open a cache
- Cache our files
- Confirm whether all the required assets are cached or not
var CACHE_NAME = 'my-site-cache-v1';
var urlsToCache = [
  '/',
  '/styles/main.css',
  '/script/main.js'
];

self.addEventListener('install', function(event) {
  // Perform install steps
  event.waitUntil(
    caches.open(CACHE_NAME)
      .then(function(cache) {
        console.log('Opened cache');
        return cache.addAll(urlsToCache);
      })
  );
});
Here you can see we call caches.open with our desired cache name, after this we
call cache.addAll and pass in our array of files. This is a chain of promises
(caches.open and cache.addAll). event.waitUntil takes a promise and uses it
to know how long installation takes, and whether it succeeded.
If all the files are successfully cached, then the service worker will be installed. If any of the files fail to download, then the install step will fail. This allows you to rely on having all the assets that you defined, but does mean you need to be careful with the list of files you decide to cache in the install step. Defining a long list of files will increase the chance that one file may fail to cache, leading to your service worker not getting installed.
This is just one example, you can perform other tasks in the install event or
avoid setting an install event listener altogether.
How to Cache and Return Requests
Now that you've installed a service worker, you probably want to return one of your cached responses right?
After a service worker is installed and the user navigates to a different page
or refreshes, the service worker will begin to receive fetch events, an example
of which is below.
self.addEventListener('fetch', function(event) {
  event.respondWith(
    caches.match(event.request)
      .then(function(response) {
        // Cache hit - return response
        if (response) {
          return response;
        }

        return fetch(event.request);
      }
    )
  );
});
Here we've defined our fetch event and within the event.respondWith, we pass
in a promise from caches.match. caches.match will look at the request
and find any cached results from any of the caches your service worker created.
If we have a matching response, we return the cached value, otherwise we return
the result of a call to fetch, which will make a network request and return the
data if anything can be retrieved from the network. This is a simple example and
uses any cached assets we cached during the install step.
If we wanted to cache new requests cumulatively, we can do so by handling the response of the fetch request and then adding it to the cache, like below.
self.addEventListener('fetch', function(event) {
  event.respondWith(
    caches.match(event.request)
      .then(function(response) {
        // Cache hit - return response
        if (response) {
          return response;
        }

        // IMPORTANT: Clone the request. A request is a stream and
        // can only be consumed once. Since we are consuming this
        // once by cache and once by the browser for fetch, we need
        // to clone the response
        var fetchRequest = event.request.clone();

        return fetch(fetchRequest).then(
          function(response) {
            // Check if we received a valid response
            if(!response || response.status !== 200 || response.type !== 'basic') {
              return response;
            }

            // IMPORTANT: Clone the response. A response is a stream
            // and because we want the browser to consume the response
            // as well as the cache consuming the response, we need
            // to clone it so we have 2 stream.
            var responseToCache = response.clone();

            caches.open(CACHE_NAME)
              .then(function(cache) {
                cache.put(event.request, responseToCache);
              });

            return response;
          }
        );
      })
    );
});
What we are doing is this:
- Add a callback to
.thenon the fetch request - Once we get a response, we perform the following checks:
- Ensure the response is valid.
- Check the status is
200on the response. - Make sure the response type is basic, which indicates that it's a request from our origin. This means that requests to third party assets aren't cached as well.
- If we pass the checks, we
clonethe response. The reason for this is that because the response is a Stream, the body can only be consumed once. Since we want to return the response for the browser to use, as well as pass it to the cache to use, we need to clone it so we can send one to the browser and one to the cache.
How to Update a Service Worker
There will be a point in time where your service worker will need updating. When that time comes, you'll need to follow these steps:
- Update your service worker JavaScript file.
- When the user navigates to your site, the browser tries to redownload the script file that defined the service worker in the background. If there is even a byte's difference in the service worker file compared to what it currently has, it considers it 'new'.
- Your new service worker will be started and the
installevent will be fired. - At this point the old service worker is still controlling the current pages so the new service worker will enter a "waiting" state.
- When the currently open pages of your site are closed, the old service worker will be killed and the new service worker will take control.
- Once your new service worker takes control, its
activateevent will be fired.
One common task that will occur in the activate callback is cache management. The reason you'll want to do this in the activate callback is because if you were to wipe out any old caches in the install step, any old service worker, which keeps control of all the current pages, will suddenly stop being able to serve files from that cache.
Let's say we have one cache called 'my-site-cache-v1', and we find that we want to split this out into one cache for pages and one cache for blog posts. This means in the install step we'd create two caches, 'pages-cache-v1' and 'blog-posts-cache-v1' and in the activate step we'd want to delete our older 'my-site-cache-v1'.
The following code would do this by looping through all of the caches in the service worker and deleting any caches which aren't defined in the cache whitelist.
self.addEventListener('activate', function(event) {

  var cacheWhitelist = ['pages-cache-v1', 'blog-posts-cache-v1'];

  event.waitUntil(
    caches.keys().then(function(cacheNames) {
      return Promise.all(
        cacheNames.map(function(cacheName) {
          if (cacheWhitelist.indexOf(cacheName) === -1) {
            return caches.delete(cacheName);
          }
        })
      );
    })
  );
});
Rough Edges & Gotchas
This stuff is really new. Here's a collection of issues that get in the way. Hopefully this section can be deleted soon, but for now these are worth being mindful of.
If Installation Fails, We're Not so Good at Telling You About It
If a worker registers, but then doesn't appear in
chrome://inspect/#service-workers or chrome://serviceworker-internals, it's
likely its failed to install due to an error being thrown, or a rejected promise
being passed to event.waitUntil.
To work around this, go to chrome://serviceworker-internals and check "Opens the
DevTools window for service worker on start for debugging", and put a debugger;
statement at the start of your install event. This, along with "
Pause on uncaught exceptions", should reveal the issue.
The Defaults of fetch()
No Credentials by Default
When you use fetch, by default, requests won't contain credentials such as
cookies. If you want credentials, instead call:
fetch(url, {
  credentials: 'include'
})
This behaviour is on purpose, and is arguably better than XHR's more complex
default of sending credentials if the URL is same-origin, but omiting them
otherwise. Fetch's behaviour is more like other CORS requests, such as <img crossorigin>, which never sends cookies unless you opt-in with <img crossorigin="use-credentials">.
Non-CORS Fail by Default
By default, fetching a resource from a third party URL will fail if it doesn't
support CORS. You can add a non-CORS option to the Request to overcome this,
although this will cause an 'opaque'
response,
which means you won't be able to tell if the response was successful or not.
cache.addAll(urlsToPrefetch.map(function(urlToPrefetch) {
  return new Request(urlToPrefetch, { mode: 'no-cors' });
})).then(function() {
  console.log('All resources have been fetched and cached.');
});
Handling Responsive Images
The srcset attribute or the <picture> element
will select the most appropriate image asset at run time and make a network request.
For service worker, if you wanted to cache an image during the install step, you have a few options:
- Install all the images
<picture>element andsrcsetattribute will request - Install a single low-res version of the image
- Install a single high-res version of the image
Realistically you should be picking option 2 or 3 since downloading all of the images would be a waste of memory.
Let's assume you go for the low res version at install time and you want to try and retrieve higher res images from the network when the page is loaded, but if the high res images fail, fallback to the low res version. This is fine and dandy to do but there is one problem.
If we have the following two images:
| Screen Density | Width | Height |
| 1x | 400 | 400 |
| 2x | 800 | 800 |
In a srcset image, we'd have some markup like this:
<img src="image-src.png" srcset="image-src.png 1x, image-2x.png 2x" />If we are on a 2x display, then the browser will opt to download image-2x.png,
if we are offline you could .catch this request and return image-src.png
instead if it's cached, however the browser will expect an image which
takes into account the extra pixels on a 2x screen, so the image will appear as
200x200 CSS pixels instead of 400x400 CSS pixels. The only way around this is to
set a fixed height and width on the image.
<img src="image-src.png" srcset="image-src.png 1x, image-2x.png 2x"
style="width:400px; height: 400px;" />
For <picture> elements being used for art direction, this becomes considerably
more difficult and will depend heavily on how your images are created and used,
but you may be able to use a similar approach to srcset.
Learn More
There is a list of documentation on service worker being maintained at https://jakearchibald.github.io/isserviceworkerready/resources.html that you may find useful.
Get Help
If you get stuck then please post your questions on Stackoverflow and use the 'service-worker' tag so that we can keep a track of issues and try and help as much as possible.